Building Webhooks with apiGO
Webhooks are lightweight, HTTP-based callback functions. With apiGO, you can build endpoints that handle webhooks, and save your data into a dataset that you can query via an API with ease.
Configuring the dataset
The first thing we must prepare is our dataset. Our dataset is basically our database where we will be storing all of our information.
Our hypothetical scenario, is we are handling Webhooks from an ecommerce platform that fire when we get orders.
The ecommerce platform has the following schema for their transaction data:
{
    "order_id": 1,
    "order_amount": 10,
    "order_currency": "GBP",
    "transaction_date": "2023-05-11T17:11:49.703Z",
    "status": "pending"
}
I've kept this example simple, but this can be a lot more rows.
In this version of apiGO, datasets must be created by uploading a CSV or an Excel file. We can simply create an empty.csv file with just the headers.
order_id,order_amount,order_currency,transaction_date,status
Let's create our Dataset and upload this file.

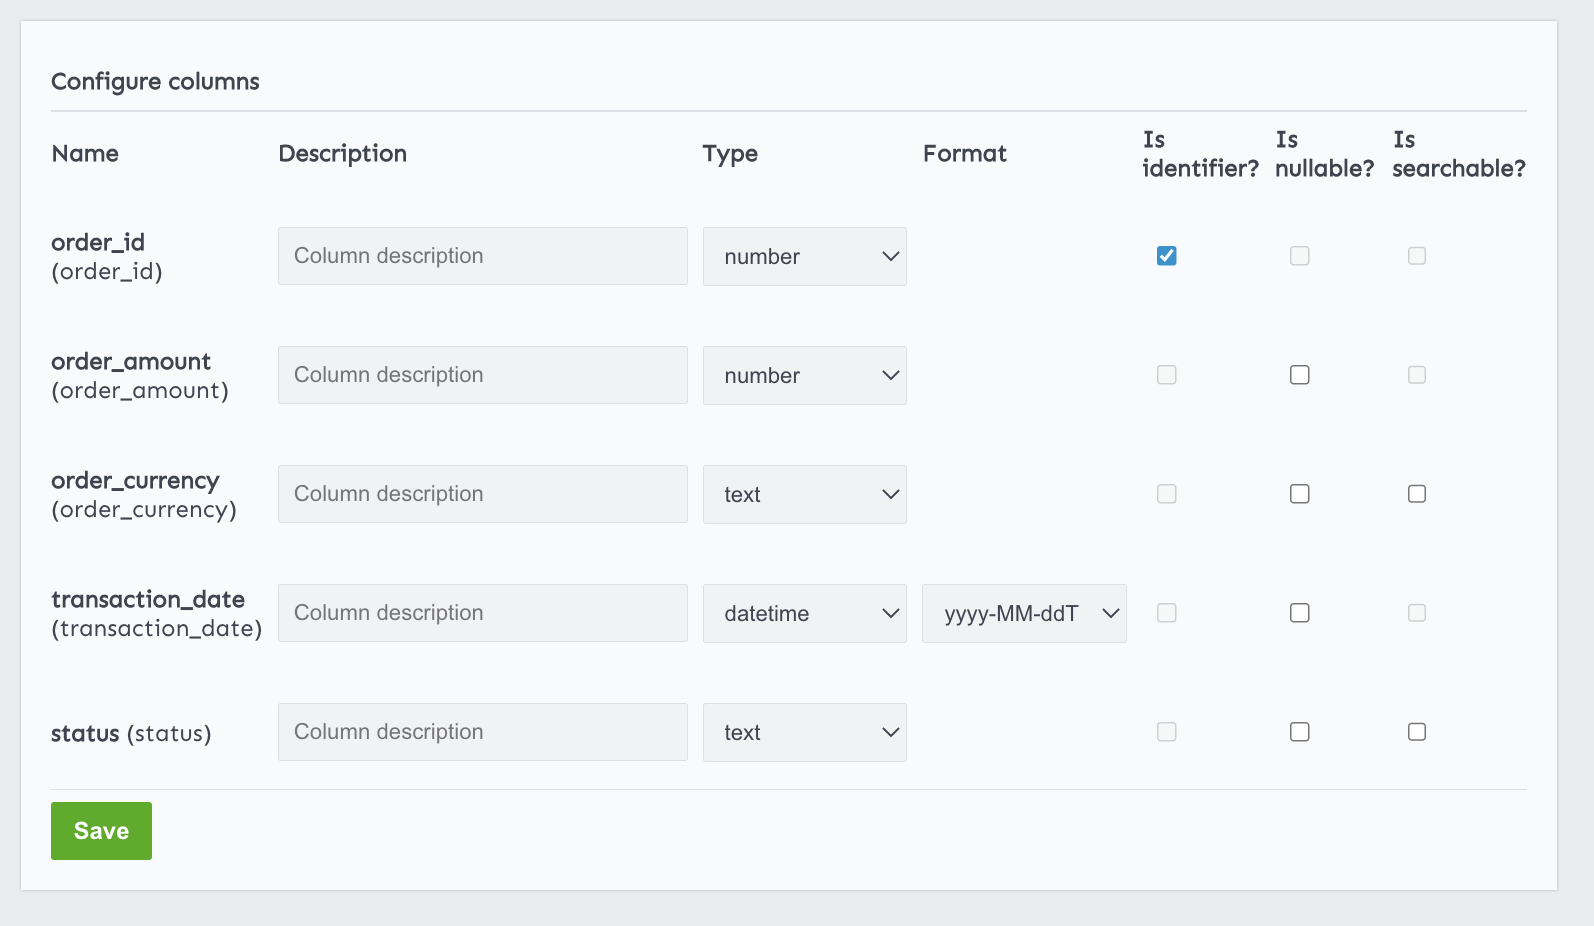
Next we're going to configure our columns. We know the order_id is going to be our identifier, and also it's a number. order_amount is also a number and transaction_date is our datetime.
Creating the POST endpoint
Next we will need to create a POST endpoint. Our webhook is a POST HTTP request.

Make sure to select the method type POST and the Transactions dataset we've configured earlier.
That should be it! 🚀
Testing our Webhook
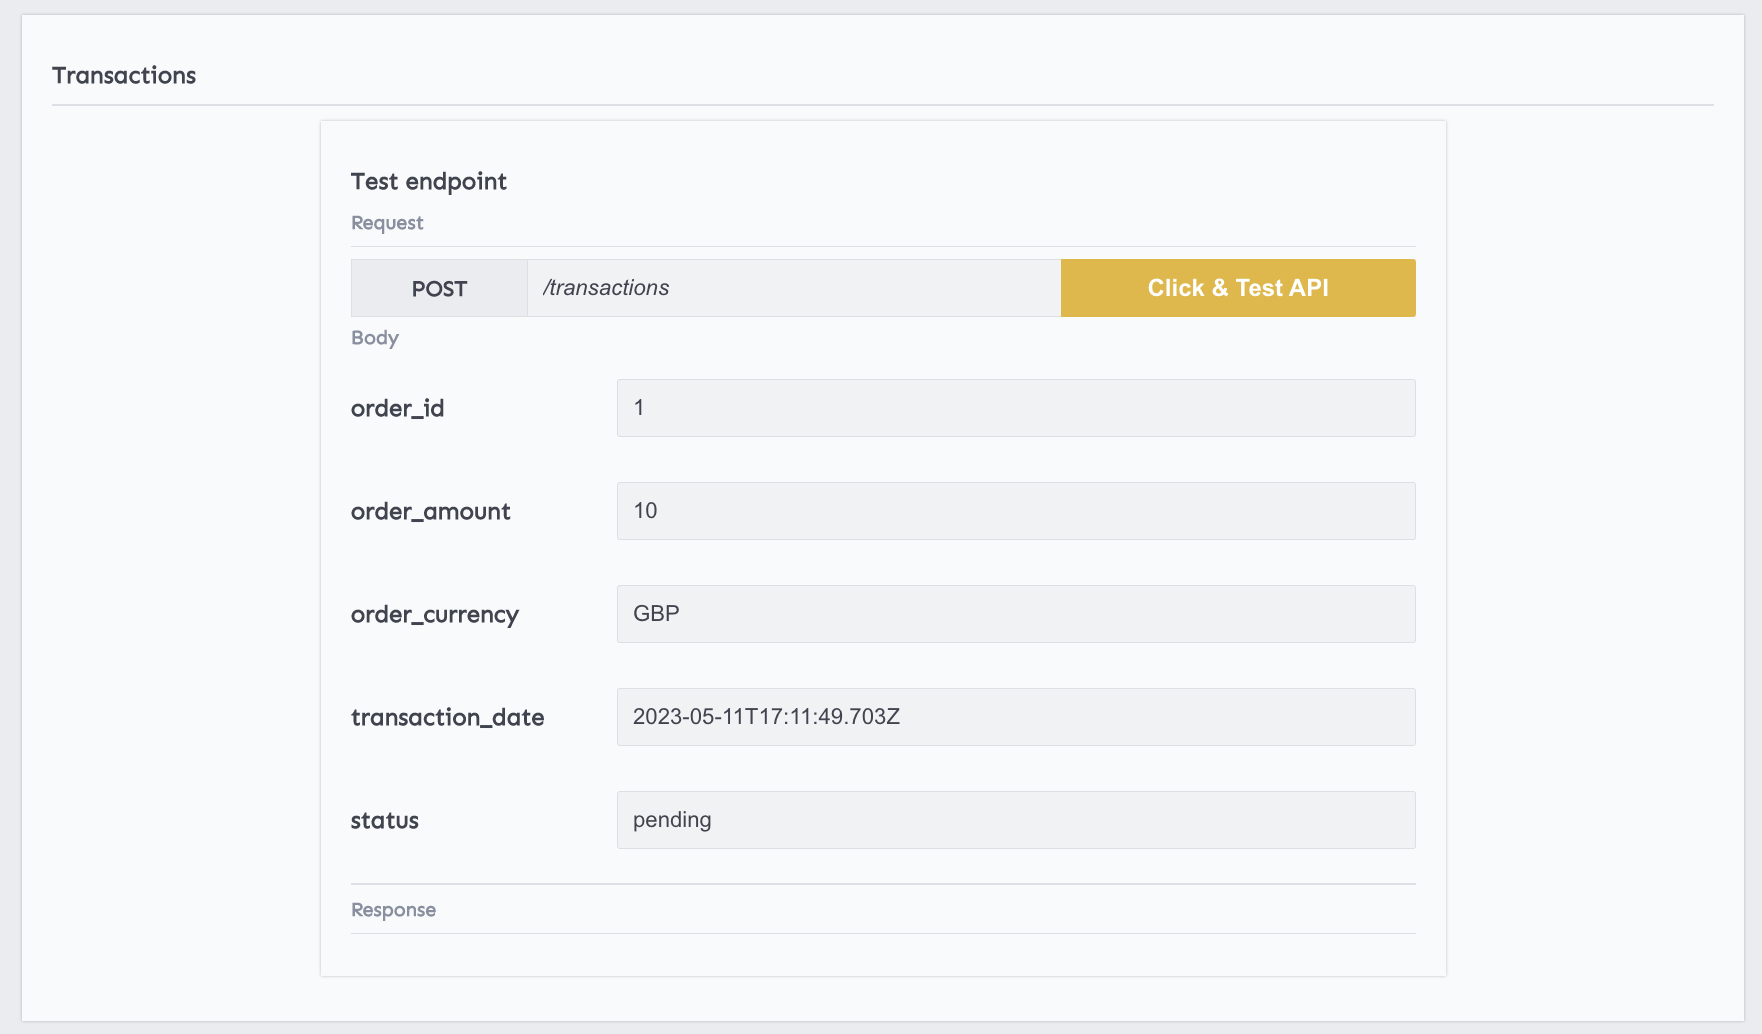
Let's use the Test endpoint via the *apiGO site to make sure the data is getting saved as expected. We can use the data from the sample we've retrieved from the ecommerce platform above.
Now let's head over to the dataset preview; we will find our tets transaction in our dataset.

Next
In this guide, we've shown you how you can create an endpoint webhook that you can use to save incoming data into your own datastore.
Next, you can configure your GET endpoint so that you can filter your data between a timestamp. Maybe even create new endpoints that you can call to get all the approved transactions.